Difference between revisions of "Texture Packs"
ROllerozxa (talk | contribs) |
m (Link to non-existent texture pack updated to mention the textures within the Mintest Game itself.) |
||
| Line 55: | Line 55: | ||
To create a custom texture pack, you must edit the default files. If you have experience with image editors then creating your own custom texture pack is fairly straightforward. | To create a custom texture pack, you must edit the default files. If you have experience with image editors then creating your own custom texture pack is fairly straightforward. | ||
| − | # Locate some source textures to modify. You can grab the original textures from mods by going into their 'textures' folder, or [https://content.minetest.net/packages/ | + | # Locate some source textures to modify. You can grab the original textures from mods by going into their 'textures' folder, or all the original textures for [https://content.minetest.net/packages/Minetest/minetest_game/ Minetest Game] from the 'textures' folders within the various 'mods' it contains. |
# Create a new folder to hold your new texture pack. | # Create a new folder to hold your new texture pack. | ||
# Use your preferred image editing program – [http://gimp.org GIMP] is free/open-source and works well – and create a PNG file for each texture that you want to modify. Any image editor that supports transparency – also called “alpha” – should be OK. | # Use your preferred image editing program – [http://gimp.org GIMP] is free/open-source and works well – and create a PNG file for each texture that you want to modify. Any image editor that supports transparency – also called “alpha” – should be OK. | ||
Revision as of 17:16, 11 October 2023
| English • français |
A texture pack is the collection of files that are used to change the in-game textures of:
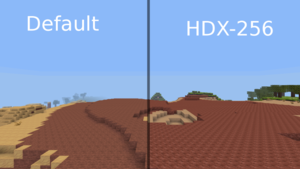
The native resolution of Minetest's textures are 16 × 16 pixels.
All versions of Minetest support custom textures with a folder under the main Minetest Folder called textures. This folder was added in 0.4.dev-20120408 (18d8e3ac). Changing texture packs is done via the in game main menu tab Content.
Installation
Since Minetest 5.0, texture packs available in the ContentDB are available in the Content tab-> Browse online content button. Texture packs installed in such a way are automatically installed.
In any version of Minetest, the way to install a custom texture pack is by doing the following:
- Download a texture pack from somewhere.
- Extract the texture pack into the textures directory in your Minetest directory. If on Windows, this folder should have a texture_packs_here.txt file inside. Use a program such as 7-zip to extract the compressed folder, if you cannot open the texture pack archive.
- Once your texture pack is copied into the textures folder start/restart Minetest.
- Select the Content tab at the top of the main Minetest menu. Texture packs will appear in green in the left hand view pane.
- Select the texture pack you wish to use using the mouse.
- Double-click or select the Use Texture Pack button on the lower right of the window.
- The word Enabled should appear next to the texture pack you selected.
Texture Packs
ContentDB has a section dedicated to texture packs. Pick the resolution you would want:

|
Low resolution texture packs (<16 pixels) |

|
Normal resolution texture packs (16 pixels - Same as default) |

|
High resolution texture packs (32 pixels) |

|
Very high resolution texture packs (64 pixels) |

|
Extremely High resolution texture packs (128+ pixels) |
There is also the Texture Packs forum in the Minetest Forums
Note that as the pixel count of a texture pack increases a more powerful device will be needed to render and run Minetest.
Texture Pack Creation
To create a custom texture pack, you must edit the default files. If you have experience with image editors then creating your own custom texture pack is fairly straightforward.
- Locate some source textures to modify. You can grab the original textures from mods by going into their 'textures' folder, or all the original textures for Minetest Game from the 'textures' folders within the various 'mods' it contains.
- Create a new folder to hold your new texture pack.
- Use your preferred image editing program – GIMP is free/open-source and works well – and create a PNG file for each texture that you want to modify. Any image editor that supports transparency – also called “alpha” – should be OK.
- The textures may be any size, but square images whose edge lengths are powers of 2 (16 × 16, 32 × 32, 64 ×64, 128 × 128, …) are preferred for visual and consistency reasons.
- Compress the folder — not only the files inside – in a .zip archive. You can then upload it onto ContentDB and/or post it in the Texture Packs forum.
For more in depth instructions please see the Creating texture packs tutorial.
