How to build your first house/de
| English • Deutsch • français • 日本語 • Bahasa Melayu |
Wie Sie Ihr erstes Haus bauen
Dieser Artikel wird Ihnen zeigen, wie Sie im Minetest-Spiel eine neue Welt erstellen, ein Haus bauen und beleuchten.
Eine neue Welt erstellen
Als allererstes nach dem Starten von Minetest müssen Sie eine neue Welt erstellen. Klicken Sie dazu im Hauptmenü auf “Neu”. Sie müssen Ihrer neuen Welt lediglich einen neuen Namen geben und auf “Erstellen” klicken.
Nun, da Sie Ihre Welt erstellt haben, können Sie darin spielen. Wählen Sie sie aus, indem Sie auf ihren Namen klicken und drücken Sie dann die Schaltfäche “Spielen”. Es wird ein Fortschrittsbalken erscheinen, der das Laden der Welt anzeigt.
Voila! Sie sollten in einer neuen Welt erscheinen. Sie müssen jedoch nicht nur herumstehen. Standardmäßig bewegt Sie die Taste W vorwärts, D nach rechts, A nach links und S rückwärts. Mit der Leertaste können Sie springen. Um sich umzudrehen und nach oben oder unten zu schauen, bewegen Sie einfach die Maus. (siehe auch: Steuerung.)
Erste Ressourcen
Nun, da Sie wissen, wie Sie sich bewegen, werden Sie einige Holzbretter benötigen. Dies ist eine der ersten und wichtigsten Aufgaben bei den ersten Schritten im Minetest-Spiel.
Bäume und Sträucher suchen
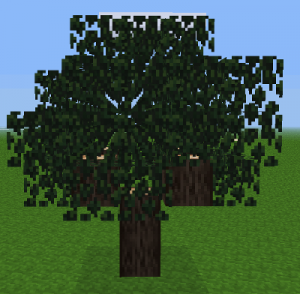
Zuerst müssen Sie einen Baum oder Strauch finden. Es gibt viele verschiedene Arten von Bäumen und Sträuchern. Bäume sind besser als Sträucher, da sie mehr Holz liefern. Falls Sie nicht sofort einen Baum oder Strauch sehen, jaufen Sie einfach so lange umher, bis Sie einen entdecken.
- Tipp: Falls Sie mitten im Nirgendwo gestartet sind, laufen Sie zuerst umher bis Sie grasbewachsene Ebenen sehen und gehen Sie dorthin. In Ebenen könnten Sie Sträucher finden und normalerweise sind Wälder nicht weit davon entfernt. Wenn das Gras gelb ist, ist es trockenes Gras und Sie haben die Savanne gefunden, die Heimat der Akazie.
- Tipp: Falls Sie mitten im Ozean starten, müssen Sie an Land schwimmen. Halten Sie, wenn Sie im Wasser sind, einfach die Leertaste gedrückt, um zu schwimmen und nicht zu ertrinken.
Chopping down a tree
If you found a tree, move towards a tree trunk (any species will do), and look at it. When you are close enough, you should see a black outline around the section of trunk you are looking at. Next you need to hold down the left mouse button. You should see cracks appearing on the tree. After a few seconds, the bit of trunk you were looking at will disappear. You will probably now be holding it in your hand. What you just did is called “mining”. If you can see a small picture of a tree section in one of the boxes at the bottom of your screen, it means it is an item in your inventory. Those boxes are your hotbar. To select different items from the hotbar, use the mouse wheel, or the number keys 1-8.
Chopping down a bush
Bushes are an alternative source of wooden planks, but they yield less wood. To chop one down, do the same as you would with trees, except you walk towards a bush (any species will do), then first mine the bush leaves (in order to reach the bush stem), then the bush stem.
Using your inventory
After you got your tree trunks or bush stems, open your inventory.
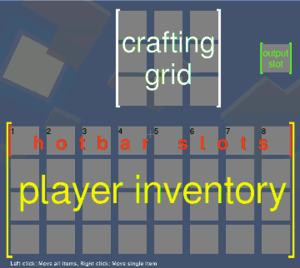
To open your inventory menu, press the I key on your keyboard. The screen should now have several rows of grey boxes on it. These are the various slots of your inventory. To move items around, left click on them with the mouse, then click where you want to put them (an empty box).
Now, break some more bits of tree or bush stem. You should now see a small number next to the item picture in your inventory. This indicates how many pieces of this item you have.
When you open your inventory, you will see a 3×3 box of squares at the top. This is the crafting grid. It is where you craft the various items.
You will now need to craft wooden planks. To do this, click on the tree or bush stem items to select them. Next, place them anywhere in the crafting grid. In your inventory menu it now should like this:
| Name | Ingredients | Input → Output | ||||||||||||
|---|---|---|---|---|---|---|---|---|---|---|---|---|---|---|
| Wooden Planks | Tree |
|
Or like this:
| Name | Ingredients | Input → Output | ||||||||||||
|---|---|---|---|---|---|---|---|---|---|---|---|---|---|---|
| Wooden Planks | Bush Stem |
|
If you chopped a different tree or bush species (e.g. acacia tree), it will give you a different kind of wood, but will otherwise behave identically.
In the box just to the right of the grid, you will see an image of wooden planks (or similar). Click on this, and you will pick up wooden planks. You should also see a log disappear from the stack of logs in the crafting grid. Congratulations! You have crafted your first item! You can place (almost) any block in your world by walking up to another node, and right-clicking on a face to put the node you are holding there.
Crafting the first tool
Before you make your house, though, there is another 2 crafts you will have to do. The first one is making sticks. Select the wooden planks in your inventory. Then, right-click any one of the slots in the crafting grid. This will only place one wooden plank in there, instead of the whole stack. Then left click somewhere else in your inventory to place the remaining wooden planks there. The crafting output box should now show sticks. Click on the stick item to receive the four sticks.
| Name | Ingredients | Input → Output | ||||||||||||
|---|---|---|---|---|---|---|---|---|---|---|---|---|---|---|
| Stick | Wooden Planks |
|
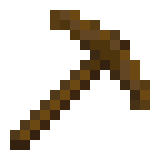
Now, for your first tool! It is a wooden pickaxe. It is used to mine stone, ores and some other blocks. To make the wooden pickaxe, using right click, place 1 wooden plank (any species) in each of the 3 boxes at the top of the crafting grid. Next, place sticks in the center of the middle and bottom rows. The output will show a pickaxe.
| Name | Ingredients | Input → Output | ||||||||||||
|---|---|---|---|---|---|---|---|---|---|---|---|---|---|---|
| Wooden Pickaxe | Wooden Planks + Sticks |
|
Take the pickaxe, and put it at the top of your inventory. Exit the inventory, then scroll to select it. You should now appear to be holding it.
Some serious mining and crafting
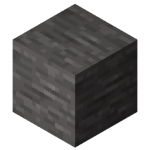
Now, for stone. Walk around until you see grey blocks. These can often be seen in cliffs whilst above ground. Go up to them, and using the pickaxe, break about 12 of them like you did with the tree. You will find they turned into a material called “cobblestone” in your inventory.
By now, it will probably be getting dark. You will need to make torches for light.
To make torches, walk around until you see what looks like stone, with black spots on it.
This is coal ore.
Break the whole cluster of coal with your pickaxe, it won’t take long.
Next, make some more sticks. At the bottom of the crafting grid put a stick in one of the boxes, then put a coal lump (this is what you get when you mine coal) above it. You will get four torches.
| Name | Ingredients | Input → Output | ||||||||||||
|---|---|---|---|---|---|---|---|---|---|---|---|---|---|---|
| Torch | Stick + Coal Lump |
|
Place these like regular blocks, and they will emit light. The torches don't burn out, so you can leave them burning all day.
Building a house
Now to make a house. You can use this as your base.
Build it how you like, for now just use wooden planks (break more trees to make them).
Use torches to light up your house.
See also Building a home.
Next you will want to make a furnace.
To craft it, fill the crafting grid with cobblestone, leaving the very centre box empty:
| Name | Ingredients | Input → Output | ||||||||||||
|---|---|---|---|---|---|---|---|---|---|---|---|---|---|---|
| Furnace | Cobblestone |
|
Take the furnace from the output slot.
Place your furnace somewhere in your house.
You will use the furnace to smelt ores, once you mine them.
But don’t worry about that yet.
Because you just completed your first awesome house, I hope you like your new home! :-)
Further reading
You probably have noticed that some of the crafting recipes you just use have variants. E.g. the wooden pickaxe could also be crafted with acacia wooden planks instead of regular wooden planks. Read Crafting and the respective item pages to learn more about this.


